As you know I often use paintings as inspiration for my instruments. I use them as historical sources, and look for paralels with existing instruments and between paintings of certain makers, times and places themselves. Being a visual thinker (often more a curse than a blessing) certainly helps in this.
But I never imagined to paint instruments themselves. And by painting instruments I mean putting paint on the thing itself, not making a picture of a lute and a couple of grapes for the local pizzeria.  It isn’t customary to paint lutes and guitars. Sometimes we find some decorated instruments in museums, but it was most often done at a later date. Like the famous “Plan de Paris” viola da gamba (ascribed to Gaspard Tieffenbrucker) in the Muncipal Museum The Hague.
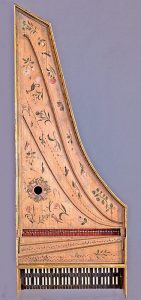
An exception to this rule are Flemish harpsichord. But this had a pragmatic reason. The Ruckers family wanted to become members of the prestigious guild of st. Luke. Although this was reserved for artists, painters, sculptors and alike, not for common craftsmen like a harpsichord maker. But to be admitted the Ruckers started to paint the soundboards of their instruments (or rather had one man to do it for them) with flowers and little pictures of animals etc.
Sometimes a project calls for something crazy, something out of the box. This is certainly the case with the Jheronimus Bosch lute. And what would be more fitting than painting some scenes of his paintings on the lute itself?
Thus I started to gather some scenes that would be appropriate…
The first one was the ‘harp figure’ from the “Garden of Earthly Delights”. A man is tortured in the strings of a harps. His arms are spread in anguish. Some art historians regard this a reflection of the typical depictions of Christ on the cross. I figured that when painted under the strings of the lute, it would give the same effect as in the painting.
 The two ‘holes’ in the top were inspired by the paintings by Jan Mandijn, after Bosch. It’s also a nice excuse to show the ‘inner works’ of the lute, as you see two harmonic bars behind the holes. In the lower hole there is an owl. You can’t make anything related to Bosch without an owl. He put them in all of his paintings, often hidden in little spaces where you don’t expect them. During the last restauration the experts even found a new, previously unseen owl when they cleaned one of Bosch’ paintings.
 On the treble side is one of the funniest drawings Bosch ever made. It’s on the first place in the book “101 practical uses for a lute beside playing it”… A man kneeled in a bee hive, there are birds flying oud of his arse. The other figure is ready to hit the first man on his behind with a lute…
The other scenes were also found in the paintings of the master. Like the shawm and blue drum, the man on the ladder, the hands, the chopped of foot hanging om a piece of lace, the false dice (normally 2 and 4 are opposites of eachother) and the beggar resting on top of the bridge. All from the “Garden of Earthly Delights”.

At school we always learned to paint the light colors first and then fill in the darker colors. But when we look at detail images of old masters like Bosch, we see that they worked the opposite way.
First they set up the dark ground and then paint the lighter colors over it. This gives the effect that the underlying layers show through the upper layers, making them blend in more.
I knew this technique from painting byzantine icons. An icon is always painted “towards the light” with thin layers of slightly transparent tempera. I used the same method for this lute, although I did use acrylic paints. Why? Because a box with natural pigments is way over my budget and I first want to get the techniques right, before starting with expensive materials. The paint is diluted with water to give it the right consistency. You don’t want thick blobs of paint on a soundboard, it would affect the sound. The layers I used are so thin that there is hardly any paint on the surface.
The board was first seized with a 50:50 mixture of eggwhite and water. This provides a nice ground layer and seals the wood pores, so the pigments don’t get sucked up by the spruce. After the painting is completed the soundboard will be coated with wax for protection.
And now the best part is to come… Puting the strings on…


Jemig man, jij kunt ook gewoon alles. Gaaf schilderwerk man!
LikeLiked by 2 people
Looking good Jan!
LikeLike